| The trouble with quartz chips |
|
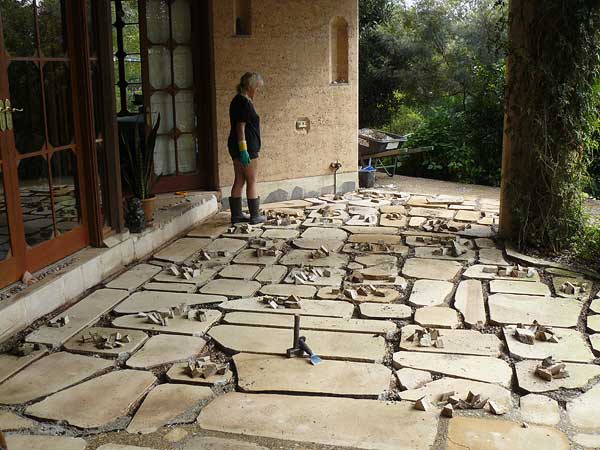
Sandstoning the apron
part V
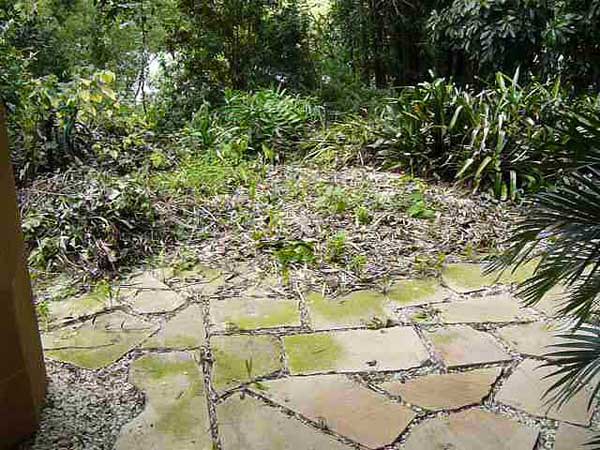
Time takes its toll
As time passed, nature did her best to green the environment by liberally blessing the quartz with an abundance of seeds - one of the “benefits” of having plentiful weeds around for making medicines!
As more time passed the seeds germinated with gay abandon and the sandstone came to look like a heavily-paved garden bed.
This made it very hard to keep clean and also promoted the growth of algae and other discolouring influences on the sandstone.
|
Reluctant to use poisons, we spent many hours weeding and scrubbing before it became obvious we were not going to win this battle and our choices were reduced to:-
- learn to live with the encroaching jungle
- prevent the seeds getting a root-hold in the gravel
We felt we had tried option 1 for long enough to know it was not the preferred solution and so we decided to replace the quarts chips between the sandstone with an impermeable fill - concrete.
Here is the story of that exercise; bear in mind that it took us about 2 hours to fill ALL the spaces between the sandstone with the quartz chips initially.
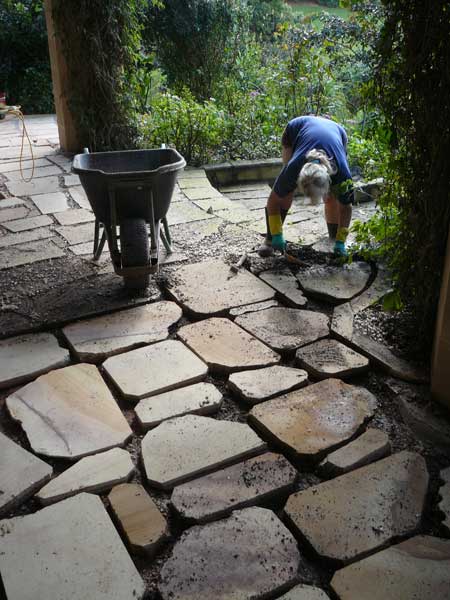
Removing the Quartz
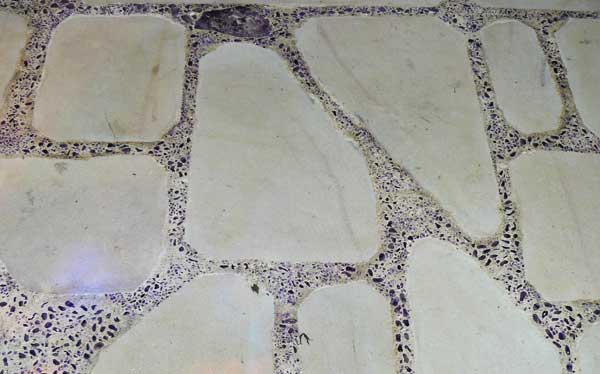
The first step was to take the quartz out to make way for the concrete - 4 years of traffic had helped the chips wedge themselves between the sandstone slabs and develop an extreme reluctance to be dislodged.
We started out with mini-picks, wire brushes, narrow trowels and any mechanical device we could think of which would get between the sandstone slabs and be able to exert enough leverage to persuade the quartz to let go and be removed.
Painstaking, back-breaking, tedious work.
It wasn't until we were about one-third of the way through the process that we discovered that a concentrated jet of water from the hose removed 95% effortlessly, leaving just a few loose bits to be brushed out.
That cut down the time factor by about 30%!
We were happy to discover that very few of the sandstone slabs needed reseating or adjusting, 99% just sat there and showed no displeasure at the violent excavation work we were doing around them. |
|
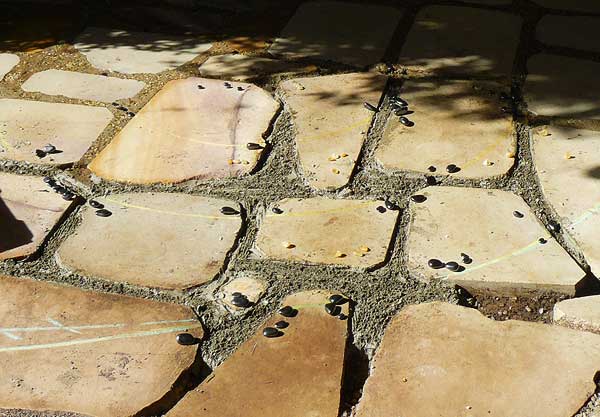
removing the quartz |
| ready for the next load of cement |
|
The approach evolved
From the beginning we were reluctant to use just plain concrete - we also had a seemingly inexhaustible supply of white quartz chips or gravel and it seemed sensible to use them in the concrete to save money and reduce waste.
Using a very high concentration of quartz meant we could create a similar look to the original but it was so difficult to work down into the spaces we abandoned that idea after one load.
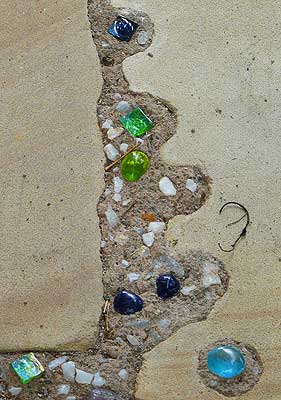
Next we decided to use gemstones here and there to add some visual interest and also some energetic variety.
This worked well but quickly ate its way through my store of gemstones and we bought a few kilos of strongly-coloured stones (jaspers, aventurines, haematite) which I thought would retain their colour even though they were in full sun most of the day.
|
The materials evolved
It quickly became clear that using gemstones - albeit semi-precious tumbled ones - would become prohibitively expensive to do all 200 square metres of paving in any concentration.
On the other hand the effect was very lovely (to us) and we wanted to persist in adding visual treats to the paving as we went.
I remembered some years ago I had used some glass and mirror in a concrete pathway for an experiment and had been surprised how difficult it had been to damage the glass.
|
|
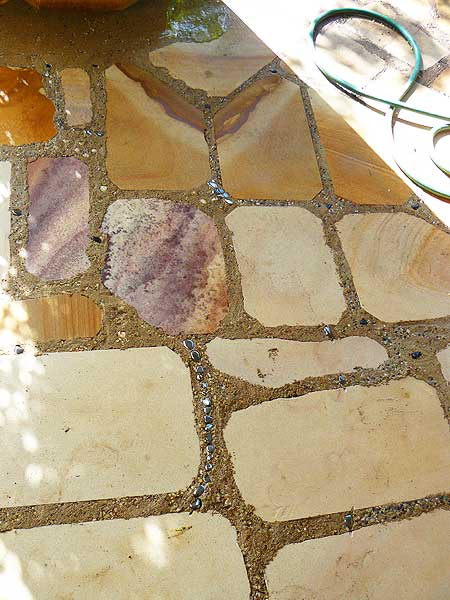
gemstones and the start of the glass baubles |
| a details of the glass and gemstone inserts in the concrete |
|
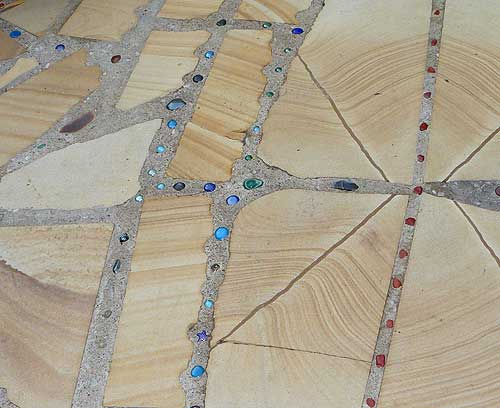
So we started a series of raids on the dollar shops for $2 bags of glass baubles.
Here is a details of what they look like (it was a cloudy day - they brighten considerably when the sun hits them).
Considerably cheaper than the gemstones we got a lot more visual bang for our bucks and became entranced with the results.
The glass pieces have - after 6 months use - proved to be lasting, non-fading and trouble-free.
|
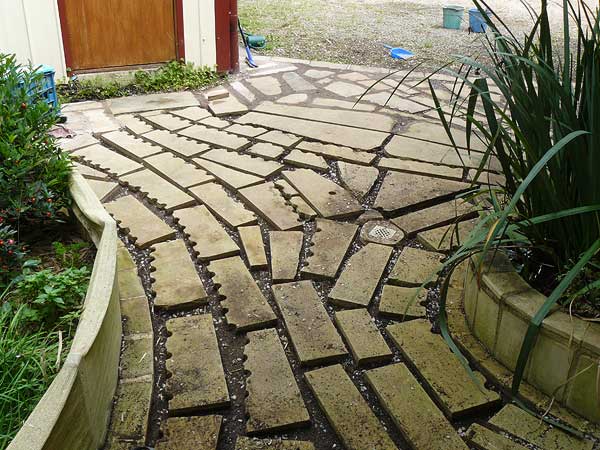
And then we came to the front
When we got close to the front patio it seemed that something special was needed and we had developed a fair degree of expertise with setting gems and bits and pieces in the concrete without detracting from the primary purpose of creating an all-weather , mud-free sure-footed surface.
The first modification was to remove all the right-angle corners from the sandstone slabs, this considerable "softened" the feel of the space.
A visit to My Crystal Warehouse - a source of wholesale gemstones for my metaphysical creations - sowed the idea of creating a semi-precious gemstone surface.
|
|
removing the corners |
| stones place in place ready for mortaring |
|
From there we decided to make a magical space using the energies of appropriate gemstones - principally amethyst, citrine, garnet and rose quartz.
The other gemstones in my workshop started to let me know they wanted a piece of the action and by the time I had worked my way through them sorting out those which definitely needed to be part of the patio I had a large selection of stones - many pf which weren't suitable for foot traffic or full sun.
We also needed to take a lot more care with putting the gemstones in the concrete and - naturally we wanted them to stay on the surface where they were visible (rather than making a very expensive concrete aggregate).
|
|
We first filled the lower 30mm or so of the space with the concrete to give a firm strong base which left around 12mm at the top where we could use mortar as a base for holding the gemstones.
Some features needed larger stones and so we had to make sure the concrete was shallower in these spots.
We now had to do 2 operations to fill the spaces but the superior results were well worth the extra effort.
|
|
the effect after the first cleaning |
| a closer look at the results - the citrine is hardly visible |
|
The finished result
Once all the paving was complete we still had the steps to do and - gaining confidence and inspiration - we elected to do a border of quartz points and a spectrum of gemstones along the front of the temple footings.
We'd been doing the concreting and stonework for around 5 months by this stage - compared to the 2 hours it took to put the quartz in in the first place!.
The sandstone was clearly in need of a heavy-duty clean and re-sealing but that would have to wait for everything to be finished.
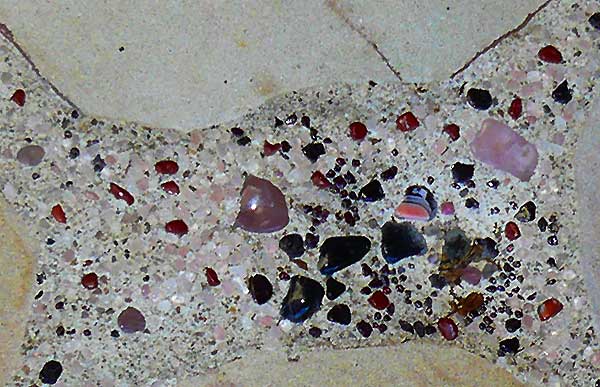
This picture shows a section of the finished paving in the citrine area - its almost impossible to make out, but the surface of the infill between the sandstone slabs is heavily encrusted with polished chips of citrine.
|
|
This is a section of the Amethyst area - at least you can get an idea of the amount of gems present in the paving.
|
|
part of the amethyst section - easy to see the stones |
| centre of the Rose Quartz and Garnet Spiral |
|
This is the centre of the Rose Quartz and Garnet area - the termination of a Sardonyx spiral, replete with ruby, Rhodocrosite, clear and smoky quartz points.
The energy on the patio had certainly been lifted quite a few notches by this stage.
|
|
|