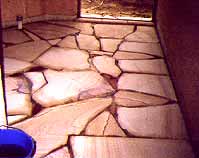
| laundry floor ready for grouting |
|
The Floors
We have two types of floor - sandstone crazy-pave tiles over concrete slabs and compacted, unstabilised earth on the ground.
Here you can see the sandstone in the 'laundry' area, ready for grouting
|
The sills between rooms
A sill detail - we used these between rooms they're about 10mm higher than the floor level.
|
|
an internal doorway sill between rooms |
| kitchen floor being poured & laid |
|
The kitchen floor
The sandstone crazy pave tiles are being laid on the slab as it is poured.
It may not be as “professional” as the conventional approach of pour the slab and then tile the surface.
However it is much less labour intensive and far stronger.
|
The kitchen floor, grouted
Would we use red grout on blond sandstone again?
Ask a woman in labour if she wants a big family!
It took more effort to get the excess off than to fill the gaps between the sandstone pieces.
|
|
the finished, grouted floor |
The Earth Floors
We wanted the building intimately connected to the planet but were loathe to use concrete slabs where avoidable. We chose earthen floors in the "dry" areas - they would be much easier on the feet than concrete and tiles - surely!
We had to elevate the floor 225mm above the ground - we decided to do this
- 50mm of pink decomposed sandstone for the final layer (top)
- thin (2mm) layer of fine white quartz (for the energy)
- 1mm bitumen vapour barrier (cold-pour emoleum)
- 175mm of earth (the same mix as the walls but without the cement stabilising) (bottom)
First the earth was carted in and an enthusiastic team of helpers started to level it - room by room. This went very well for the first 3 rooms but then we were getting towards the bottom of the earth pile which had absorbed a lot of water from the ground (it had been raining on and off for around 2 years!)The earth was so moist it couldn't be spread or leveled or compacted - we just had to leave it to dry out - at least it was out of the rain!
If at first .......
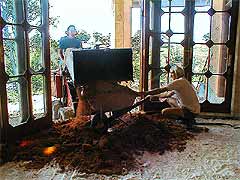
Yes - that is a rotary hoe in the main room!!
The general mayhem which resulted from first attempt to build the earth subfloors has been dug up and is ready for hoeing (to reduce the large lumps to a much smaller size) followed by spreading, leveling and recompacting.
|
|
the rotary hoe - ready to chew up the lumps |
| Spreading the emoleum on the subfloor |
|
Sealing the subfloor
The reworking of the earth floor worked reasonably well and we ended up with a fairly flat but indented surface.
Spreading the bitumen (emoleum) on the subfloor - those surface imperfections were deliberately left to provide a key for the next layer.
The bitumen water vapour barrier will remain pliable and reasonably elastic for many, many years and will accommodate and movements of the earth floor and subfloor without failing.
|
Council: “We don't want to know”
This was something the council could not understand - the material is used to patch roads which leaves it sitting in the sun all year round with heavy vehicles pounding it at high speeds and it endures this treatment well.
I explained that used under the floor, out of the air and sun and weather with no load variations to stress it, the layer would be far superior to the plastic sheeting recommended "by the book" which they acknowledged would fail of its own accord in about 6 years.
After 6 months of supplying extensive supporting research and material (apparently common sense is not accepted in the building approval section), the council relented with a terse comment "Do what you want, just don't tell us, we don't want to know".
|
|
A sticky business this - the emoleum had a
definite affinity for exposed human flesh. |
| The bedroom floor |
|
The emoleum skinned over within 12 hours and could be gently walked on without damaging the surface, it remained quite flexible for weeks.
|
|
The main room |
| Spreading the layer of white quartz |
|
Spreading the layer of white quartz - its quite thin but will provide a bright energetic base for the floors.
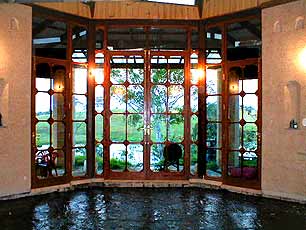
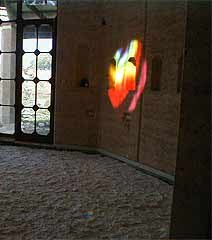
The cupola was brightening up proceedings considerably during the sunny days - we found it a challenge to feel glum with this spectacle about!
|
|
The cupola brightening up proceedings |
| The final layer starts to arrive |
|
The final layer of pink decomposed sandstone starts to arrive
A dingo delivers the top floor layer to a waiting wheelbarrow for distribution around the room.
We had to level it to about 150% of the final thickness so it would compact to the right height - we came within 2-5 mm throughout!
|
|
The final layer ready to level |
| the compaction starts |
|
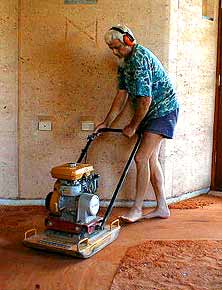
The first pass with the compactor - it performed extraordinarily well once we discovered how wet the earth needed to be to compact.
|
|
round and round we go! |
|
Once level we continued to compact it to produce a good surface - round and round, round and round! The streaks came from lumps of dark sandstone which would powder on meeting the compactor and spread out under the plate.
If we wet the floor too much it would stick to the plate and need to be scraped off. The result was furrows rather than a flat surface! Too dry it wouldn't compact easily, if at all!
|
|
too much moisture |
| floor tamping |
|
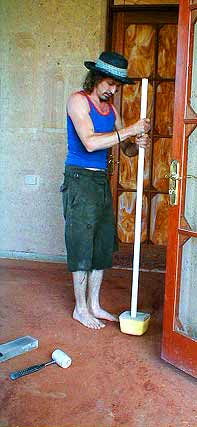
Once the compactor had created a flat, useable floor surface we had to deal with minor imperfections. These tampers - ice-cream containers filled with concrete and with a conduit handle worked a treat - especially the rounded edges preventing unsightly dents.
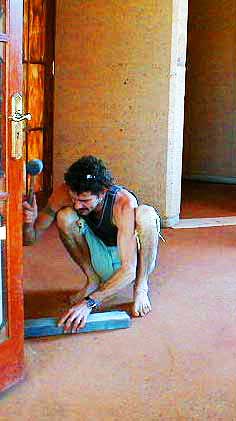
The final detailed tamping around the edges of the floors - produced a great finish at the walls edge.
|
|
the final detailed tamping round the edges |
The final treatment
An earth-bonding emulsion (PVA-based) is brushed on to seal the surface and stop it deteriorating. We didn't use and cement stabilisation in the floors to prevent them becoming rock-like and unyielding to our feet.
This was to prevent the surface breaking up while retaining the flexibility of the floor. The floors work well but, after 3 months use, we notice they don't like sharp objects dropped on them - however any gouges can be easily repaired with some mixture and bonding emulsion and a rubber mallet - a very practical user-friendly surface.
|
|
the final sealing |
|
|


