|
|
|
|
|
|
Our first construction at Middle Path - a shed
Our first weeks in CW317 were pioneering - we had no running water or other facilities which we take for granted these days.
The immediate priority was to create some creature comforts. It was winter, which in some ways was fortunate as the weather tended towards dryish.
We were developing a new set of skills such as squatting over a hole in the ground holding an umbrella and attempting to keep a roll of toilet paper dry whilst keeping a wary eye out for slithering wildlife.
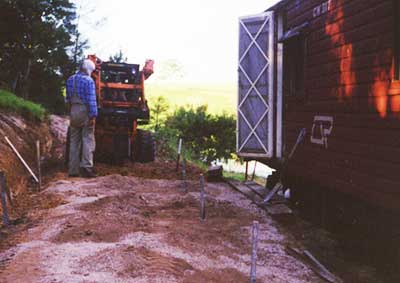
Preparing the ground
One main feature was our immediate neighbours - their house was about 15 metres uphill from our camp wagon and there was not much screening between.
We decided to build a shed in the space between (we had cut a pad before the CW317 arrived) which would serve many purposes including creating a privacy screen.
|
|
| Drilling holes 2m X 450mm holes for the drop-chute dunny |
|
Once the posts were set we poured the floor by hand, the first real work with the new cement mixer.
The slab was 10m X 1.8m with 2 large holes over the drop chutes and a open drain along the back (to shed water coming down the slope)
It was a long, hard day's work and there wasn't a lot of time for much finesses but we did manage to include some tiles and plumbing as we went along.
|
|
The frame
Nearly all the materials used to build the shed were recycled - a lot we had purchased from our ex-landlady at Curramore Road whose late husband appeared to have been a collector of building materials.
The frame was made from 6 X 4 hardwood posts cemented into the ground, the rafters came from the Maroochydore auctions and the main beams we found at the Yandina demolition yard.
They were a real treat - 7 metres long 8 X 2s, perfectly straight hardwood beams which had supported the top floor of a rural store at Eumundi.
I routed the runes into the front beam and some other symbols in the rear one, the ends were decorated with smiles.
|
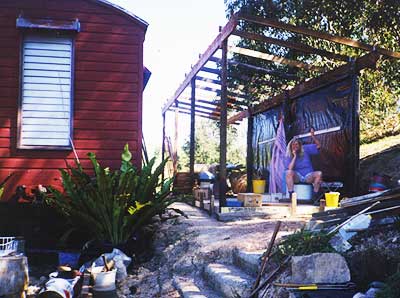
Our first roof
Trijntje is modeling the new luxury open-air ablutions - at least we didn't have to dig holes any more.
The open-air kitchen-cum-barbeque is in the foreground and the first set of steps is proving to be another education (especially at night).
|
|
|
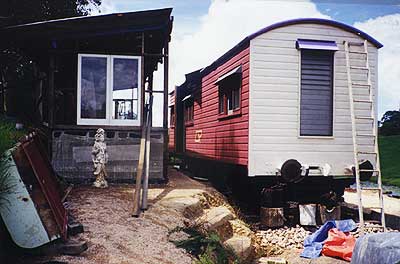
| a home amongst the gum trees |
|
|
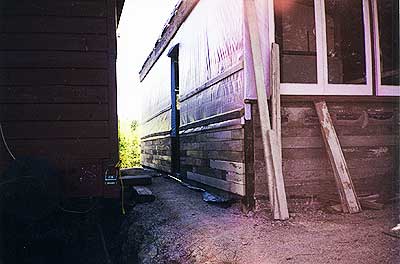
Adding the tin
I had been helping a friend clean-up a building site and had discovered to my delight that part of the material to be cleared up was a stack of roofing iron exactly the length we needed for the shed roof.
A roll of sisalation made it look just like new from underneath and a tube of silicone repaired the old holes while I made new ones in the right places.
And so we had the first side filled in which gave us shelter from the rain but not from the wind.
|
The shower tray was also cast from cement but lined with tiles from wastebusters (our main material source for many years).
The first walls
Although the posts were cemented into the ground I was keen to add some bracing to the building so we chose the infill the end walls with reinforced cement.
We simply nailed formwork across the end sets of posts and poured cement in t sill height.
We decorated the walls with crystals, rocks and granite as well as texturing the surface using fluorescent light diffusers from wastebusters.
|
|
| shelter from the wind - stage i |
|
| shelter from the wind - stage ii |
|
|
The front wall
A stack of recycled cyprus lining boards and some of the plastic we had left over from covering CW317's roof made the front wall and the wind was finding it increasingly difficult to get to us.
The windows we had rescued from a home in Brisbane which had upgraded their delightful silky oak windows to aluminium.
|
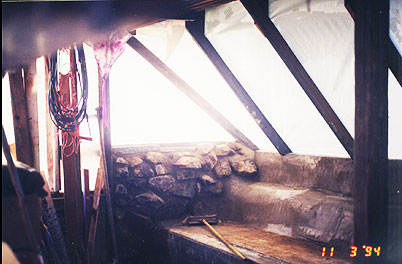
The final “wall”
By now it was apparent that the interior of the shed would be quite cramped and dark if we built a conventional vertical wall on the last side - which wasn't appealing at all.
In an effort to maximize the shed's volume and create a privacy screen which let light in (and also because we still had some of the carriage roof plastic available) went for a conservatory space.
The uphill end of the wall is secured to a concrete beam we poured using a similar technique to the way we built the poured earth pump house.
This got rid of the cramped feeling and made the inside quite light but created some new challenges - principally a couple of large triangular openings and an interior waist-high wall of naked earth.
|
|
| the conservatory-style non-retaining “wall” |
|
| Trijntje moving the earth |
|
|
The inside story
We divided the shed into several sections: toilet, shower, laundry, garden shed and workshop.
At the toilet/shower end we elected to leave the earth bare and build an indoor garden with a simple bamboo wall to stop keep the earth and plants in place.
The bamboo came from our scavenging at the Maleny Folk Festival where we had enjoyed our “Wizards of Eyes” stall.
It looked great but was simply not durable in a moist environment and rotted out within a few years.
|
The other end
Storage space was becoming keenly valued and the other end needed to accommodate as much stuff as we could fit while still retaining some semblance of access to it.
A cement platform seemed to be the obvious choice and so we cast a 600mm high wall and poured a slab on top with a rendered wall behind it.
|
|
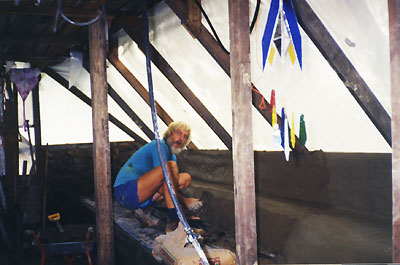
| Fergus rendering the earth |
|
|
|
The finished result
This is what we ended up with - what you can's see here are the 6 or so growing gum trees just the other side of the plastic whose roots would find these fortifications no barrier to their growth.
This wall soon developed cracks and fissures which created openings for ground water to flood in.
After a few years the shed floor is invariably inundated whenever we get a heavy, sustained rainstorm, however it drains fast and the wet doesn't seem to have any effect on the shed - just the perishables which may be stored within it.
|
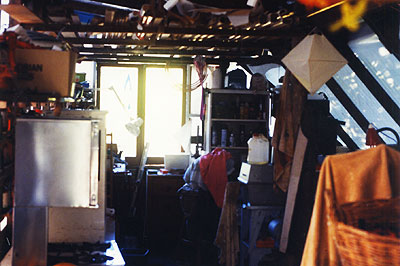
The shed in action
Here is what the shed looked like one we got the building out of the way - at the workshop end.
The shiny object on the left is a recycled oven-cum-cooktop awaiting installation in the railway carriage - CW317.
The top of the picture shows the timber rack which hangs from the roof - there wasn't much wasted space in there in those days.
At the back is Fergus' stained-glass bench and the workshop area.
|
|
|
middlepath.com.au> Middle Path> About Middle Path> The first Shed at Middle Path
|
|