Plant Terraces |
We build our pot plants a happy home at long last |
At last! Happy weed-free, level, sunny places to live! |
Although the plants are one of our major joys at Middle Path we have, for over 18 years, had no allocated place to keep the plants we've potted up. They have sat around on weed mat in out-of-the-way places and been shifted hither and thither as the space they occupied became needed for some other use.
In September, 2012 we had had enough and decided to convert the disused chook shed into an orchid home and build terraces for our other pot plants running down the hill alongside our drive.
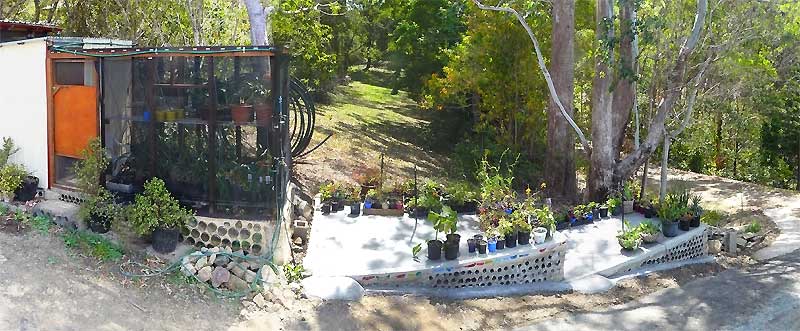
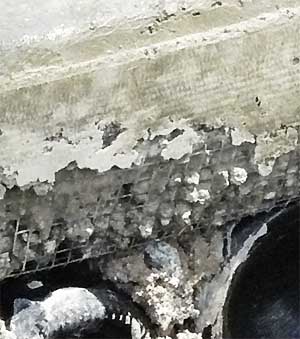
Here's what it looked like before we began - the whitish thing in the middle is horizontal to give an idea of the slope we were dealing with.
Here's how we did it
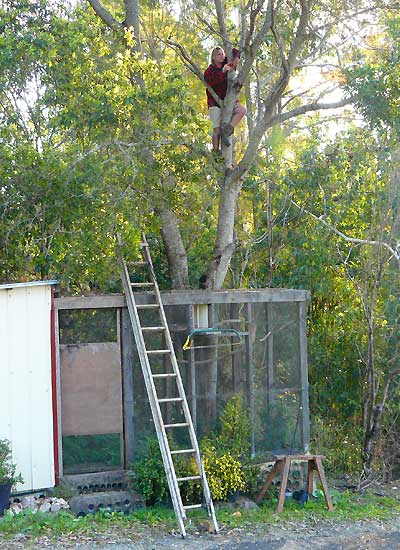
Naturally the first step is site preparation which consisted of clearing vegetation, tree limbs, shrubs etc.
|
|
|
|
|
Meet the neighbours
One major concern was the presence of a giant red bull ants nest right next to where the footings were going.
These ants are huge - up to 30mm long and get most agitated when the ground around their nest is disturbed so digging the footings was a case of one eye on the trench and one eye on the nest.
We didn't want to get rid of them or unduly damage their home but progress has its price and the footings needed to go right past their front door.
In the end we bent the footing as much as we could to accommodate them and they are still resident. Wearing thick socks certainly helped reduce the intensity of their bites.
|
The chook house conversion
We emptied out the old chook house floor which provided some rich plant food for nearby gardens.
Galvanised nursery shelving seemed the best solution for providing level, airy spaces to put the orchids but building supports for the shelves seemed an arduous choice and probable over-consumption of scarce (at the time) materials.
|
|
|
|
|
The hanging shelves of Middle Path
We use galvanised chain to hang them from the uprights which was very simple to do using D shackles to connect the shelves to the chain.
The back of the shelves sit on small hardwood blocks bolted to the uprights and an occasional screw keeps them in place.
They are very easy to adjust or remove and work perfectly for the plants.
|
Shelf hanging detail
Here's a close-up of how the shelves are connected to the chain.
|
|
|
|
|
Back to the trenches
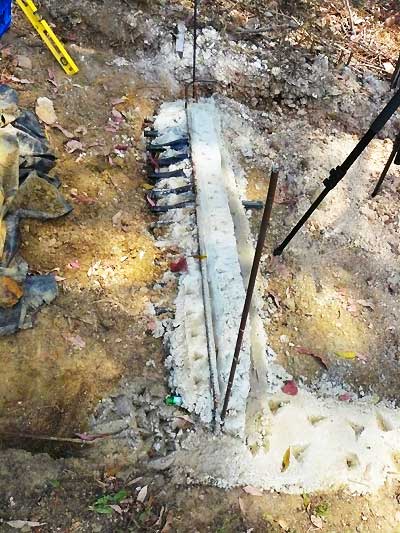
Not being fans of excessive earthmoving we elected to run strip footings down the slope which consists of a unique (to the area) white clay that can get very slippery after a few months rain.
We locked these in place with piers every metre or so - these are not so much load-bearing as locating pins to make sure the footings don't slide down the hill in extended wet periods taking the terraces with them.
|
The concrete pouring starts
We followed our usual work pattern of a couple of hours on the building before the day's work in the clinic and office.
A really effective schedule for building with bottles but it meant that we could only pour a section of the footings at a time.
This is our first pour, the rounded corners are to make the structure more user-friendly. We used plastic garden edging to create the curves and rebar at the corners to add strength.
|
|
|
|
|
and continues
The bottom footing between the two terraces was deep enough at the far end to start introducing bottles directly into the concrete base.
We had a supply of champagne bottle which are very sturdy and are a quick way to save on concrete without compromising the volume of the footings.
They act like a large aggregate and don't seem to weaken the footing in any way while adding considerable volume.
|
Bottle washing
Key to the strength of the walls is the fusion of the mortar and the bottles - they need to be firmly bonded and that means the bottles have to be clean with their lables removed.
After lying around for many years these bottles were definitely in need of cleaning before being used and each day's work was divided into laying another course of bottles and then cleaning another batch for the next day.
|
|
|
Laying the bottles
Each day a single layer or course of bottles was added - sometimes at the corners we would add more as these needed a lot more mortar to accommodate the curve.
|
|
Adding an equal proportion of hydrated lime (to cement) in the mix gave us a couple of advantages - a much smoother and easier to work with mortar or mud as it's known which oozes round the bottles as they are pushed into the bed. This was also aided by the addition of a small (1 teaspoon) of low-acidity detergent to the water before adding to the mixer.
The lime-rich mortar also achieves a stronger bond with the glass and so greatly increases the strength of the walls. We also incorporated barbed wire and brickies mesh between the courses to inhibit cracks developing ing over time.
|
The Rim
One main advantage (for us) of the design was that - once the bottle walls were complete - we could pour a rim on the top which would act as form work for pouring the pads for the terraces.
Because they were so far from the ground we were nervous about making timber form work due to the amount of effort and materials needed.
This is the form work ready to pour the rim - F-clamps with spacers are a quick and easy way to make the shape while the twisted-rope tensioner adds plenty of pressure to keep the outsides in place.
This form work is essentially sitting on top of the bottle walls and can be moved to make the best fit to what were quite uneven surfaces.
|
|
|
|
|
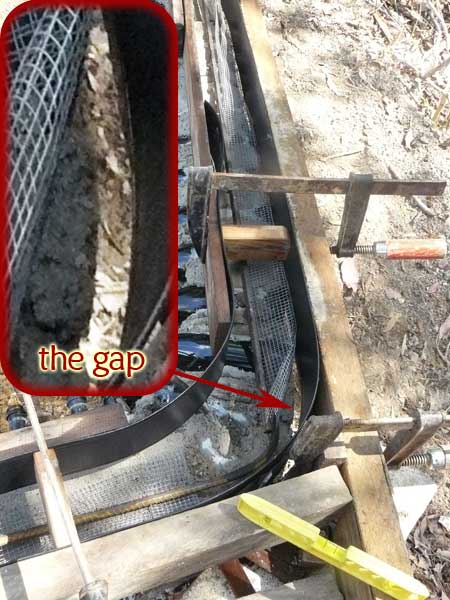
Dealing with the Gap
The bottle walls were built "free hand" which resulted in rather uneven (vertically and horizontally) surfaces - you can see the gaps which we had to deal with when we added straight form work for the rim pour.
In some places we had to get the concrete to stay in place while spanning a 25mm gap. We did this with a fine (6mm) galvanised mesh - we had plenty of this which had come from the chook house, folded over it made an effective bridge for these gaps.
The rims were poured in two stages - the lower half was a very stiff sand-rich mix which minimised the leakage through the mesh and went off very quickly.
The top half was a standard concrete mix which was easier to work to make the straight and level surface for the terrace rims.
|
The Rim bottom
Here's what the first or lower half of the pour looked like - about 50mm thick (the rims are 100mm X 100mm) ready to add the rebar and then fill to the top with the more fluid mix.
|
|
|
|
|
The aftermath
With the form work removed there is no noticeable difference between the 2 layers.
The mesh with concrete extrusions makes an excellent key for rendering the rim for a neat finish.
|
|
|
Additions
Because the terraces are right next to the drive we felt it prudent to add reflectors to warn visitors of their presence.
These were inserted before the top half was poured and looked like this when the form work was removed.
|
Decorations
The reflectors on the lower terrace added a touch of colour so we decided to add more colour to the top terrace rim using opaque stained glass.
These were off cuts from the Rainbow Serpent clerestory and were used as-is.
You can see the pieces inserted as they were between pours and the finished result (before they were cleaned).
|
|
|
|
Another look at the work in progress |
|
|
Grounding the pads
The majority of the plants who reside on these terraces will be medicinal herbs we will give to clients to help them deal with various health conditions and it is important that they (the plants) feel well-connected to the earth energies to make sure their healing properties reach full potency.
To make sure that the concrete slabs were well-connected to the planet's energy we made up conductors - a bit like lightning conductors in reverse - to conduct the energies from the ground up into the pads.
Based on quartz crystals individually programmed for appropriate energy-related tasks these were inserted in specially-drilled holes within the terraces.
Individual crystals were also used within the rims to make the plant's new home positive, potent and a happy botanical space.
|
The conductors
I would have preferred to use silver but it was much more economically feasible to use copper. I compromised by silver soldering the ends where the energy would be absorbed from the ground (aided by a laser crystal buried in the earth- 2) and transmitted (3).
- Crystals for the rim and a conductor
- the grounded end of a conductor
- the pad or transmission end of a conductor
- conductor tied to rebar
- conductor in hole ready for concreting
|
|
|
|
|
Filling the spaces
We were making the terraces in conjunction with cementing the carport floor so that we could use the fill from the carport in the terraces and also combine the concrete delivery costs for the 2 projects.
Paul Martin from Maleny Concreting was generous in his help and support throughout the work and his input certainly improved the end result of both undertakings.
|
Ready for the pad pour
Plastic film, sprinklers and reinforcing mesh have been added to prepare for the concrete to make the pads.
As these needed about 1.8 cubic metres of cement it just wasn't feasible to make it ourselves so we added it to the delivery for the carport floor for about $300 - probably less than it would have cost us for just the bags of cement we would have needed to make it ourselves.
|
|
|
|
|
The cement arrives
This rather dramatic shot of the cement delivery truck's arrival captures the spirit of the moment.
It had to reverse down 100 of winding drive,and them make a sharp turn up the steep slope past the terraces to get to the carport with a full load (around 6.5 cubic metres or 16 tonnes) of wet cement.
Characteristically it all went perfectly.
|
The final pours
It is certainly a convenient way to make pads however I discovered that controlling a chute full of wet cement when the truck is on a slope is no easy thing.
|
|
|
A panorama of the Orchid home and plant terraces |
|
|